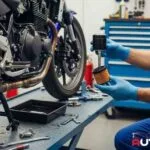
Most riders either waste money on overpriced detailing kits — or grab the wrong basics and slowly wreck their paint. You don’t need either problem. This guide gives you the exact setup that works for daily riders, keeps your bike looking sharp, and costs under $50.
If you’re just getting into small bikes or budget riding setups, you might also wonder whether a small engine bike is actually practical. For example, this guide breaks down real-world usage in detail: Is a 50cc Dirt Bike Good Enough for Adults?
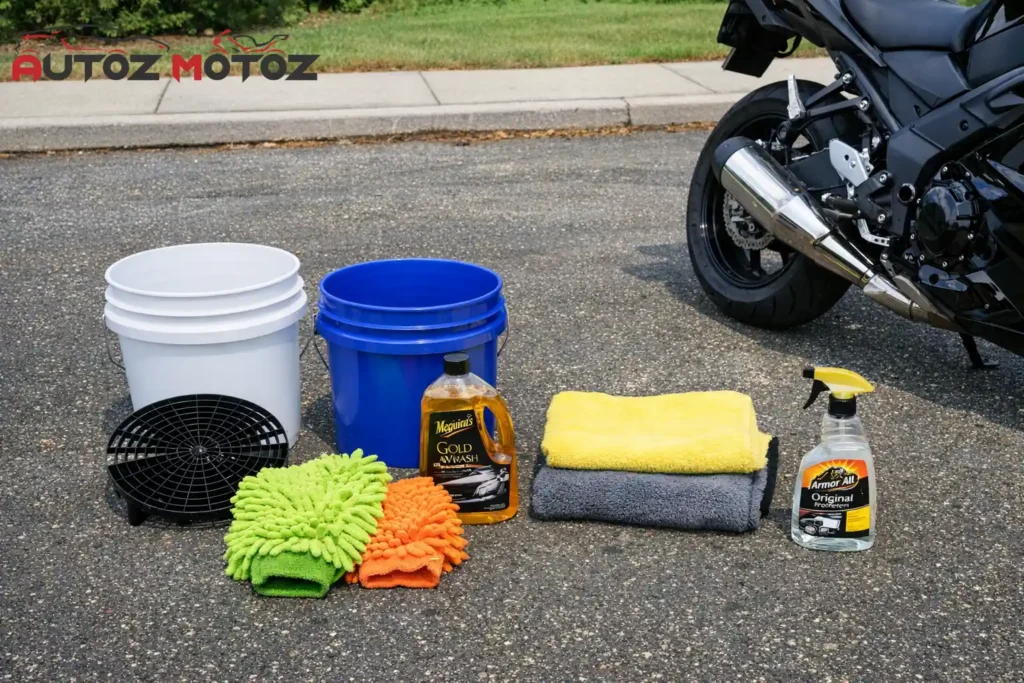
What You’ll Get From This Guide
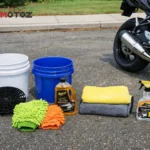
- A complete motorcycle wash kit for $35–$54
- The two-bucket method explained simply
- Step-by-step wash routine you can follow right now
- What NOT to use (and why it damages paint)
- Answers to the most common wash questions
The Core $50 Wash Kit
These five things are all you need. Nothing extra. No upsells. Every item here has a specific job that protects your paint.
Two Wash Buckets
One bucket for soapy water. One for rinsing your mitt. This simple split is the single biggest thing you can do to stop paint scratches.
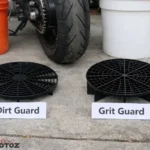
Dirt Guard Insert (Grit Guard)
This sits at the bottom of your rinse bucket. It traps dirt and grit so they sink and stay down. Without it, grit swirls back up and gets on your mitt.
Microfiber Wash Mitt
Lifts dirt away from paint instead of dragging it across. Far safer than sponges, which grind grit right into the clear coat.
pH-Neutral Wash Soap
Lifts dirt without stripping wax or sealant. Never use dish soap — it’s designed to cut grease, and it will strip your paint protection every single time.
Microfiber Drying Towels
The last thing that touches your paint matters most. A rough towel on a wet surface leaves swirl marks instantly. Plush microfiber or waffle-weave microfiber only.
Quick Detailer Spray
Not required, but useful between full washes. Spray on, wipe off with a clean microfiber. Removes light dust and fingerprints in 2 minutes.
One of the most confusing parts of motorcycle cleaning is understanding dirt control tools. For example, many riders mix up bucket inserts and assume they do the same job, but they actually work differently. If you want a clear breakdown of this, I explain it here: Dirt Guard vs Grit Guard: What Actually Works Better?
If you’re building a complete riding setup, communication gear is just as important as safety and cleaning tools. I’ve covered some of the best rider-tested options here: Best Bluetooth Headsets for Motorcycle Helmets
How to Wash Your Bike the Right Way
Having the right gear only works if your technique is right. Here’s the step-by-step routine:
Let the Engine Cool Down
Never spray cold water on a hot engine. Let the bike sit for at least 20–30 minutes. Water hitting hot metal or chrome can cause thermal shock and cracking.
Pre-Rinse the Whole Bike
Use a gentle hose flow — not a pressure washer — to knock off loose dirt and mud. This prevents dragging big debris across the paint in the next step. Start from the top, work down.
Set Up Your Two Buckets
Bucket 1: soapy water (follow the soap’s mix ratio). Bucket 2: clean water with your dirt guard insert at the bottom. This setup is the core of scratch-free washing.
Wash in Sections — Top to Bottom
Dip mitt in soap → wash a section → rinse mitt in the clean bucket → rub against the dirt guard → dip in soap again → repeat. Start with fairings and tank. Do the lower sections (swingarm, wheels) last — they’re the dirtiest.
Final Rinse — No High Pressure
Rinse the whole bike with a steady hose. Keep water away from electrical connectors, the air filter, and the exhaust pipe opening. Avoid blasting bearings or chain directly.
Dry With Microfiber — Straight Lines Only
Lay the towel flat and gently pat or pull it across the surface in straight lines. Don’t scrub circles into the paint. Use a second dry towel to get the spots you missed. Let the bike air dry for a few minutes in a shaded spot to help.
Lube the Chain After Every Wash
Water washes out chain lube. Always re-lube your chain after washing. Spin the rear wheel slowly and apply chain lube to the inside of the chain as it moves. Wipe off any excess.
If you want a complete step-by-step breakdown of the safest method, I covered the full process here: How to Wash a Motorcycle Without Scratching Paint
What NOT to Use on Your Motorcycle
- ✕Regular sponges — They trap and hold grit right against the surface. Every stroke drags abrasive particles across your paint. Microfiber mitts only.
- ✕Cotton bath towels — Too rough. Leaves swirl marks on clear coat, especially when wet. This was my $180 mistake.
- ✕Dish soap — Designed to cut through grease. It absolutely does — including your wax and paint sealant. Strips protection every single wash.
- ✕Pressure washers (high setting) — Can force water into bearings, electrical connectors, and seals. If you use one, keep it on the lowest setting and stay 2+ feet away.
- ✕All-purpose household cleaners — Formulated for hard surfaces, not automotive paint. Can dull clear coat or cause chemical staining.
- ✕Paper towels — The fibers are wood-based and stiff enough to cause micro-scratches. Never use them on painted surfaces.
Frequently Asked Questions
What type of soap is best for washing a motorcycle?
Use a pH-neutral car or motorcycle wash soap. Using dish soap strips protective wax and sealant and can make paint lose its shine over time. Brands like Chemical Guys, Meguiar’s Gold Class, or Adam’s Polishes all work well and cost under $15.
Why do I need two buckets to wash a motorcycle?
One bucket holds your soapy water. The other holds clean rinse water. Every time you dip your mitt into the rinse bucket, you knock dirt off before going back into the soap. This stops grit from being dragged across your paint — which is the number one cause of swirl marks.
Can I use a regular sponge to wash my motorcycle?
No. Sponges trap dirt and grit against the surface and drag it across the paint. This causes fine scratches that show up as swirl marks in sunlight. Use a microfiber wash mitt instead — it lifts dirt away from the surface rather than grinding it in.
How often should I wash my motorcycle?
Wash your bike every 1–2 weeks if you ride regularly, or after any rain ride, mud exposure, or long highway trip. Salt from roads, dead bugs, and tree sap can etch into paint if left sitting too long — especially in summer heat.
What drying towel should I use on a motorcycle?
Use a plush microfiber drying towel or a waffle-weave microfiber. Never use cotton bath towels, paper towels, or chamois — all of them can leave scratches or swirl marks on paint, especially on wet surfaces.
Is a $50 motorcycle wash kit good enough?
Yes — for most daily riders, a $50 setup is more than enough. The key isn’t expensive products. It’s using the right tools (two buckets, microfiber mitt, pH-neutral soap, microfiber drying towel) and the right technique. A $200 detailing kit won’t help you if your wash method is wrong.
Technical precision in motorcycles, cars, and automotive gear is established by Nahid Hassan through rigorous evaluation. Performance-driven reviews and high-value affiliate insights are consistently curated at AutoZMotoZ to ensure reader trust. Absolute integrity is maintained in every analysis, with a focus on original and human-verified data.